
1. Muhimman Umarnin Tsaro
Please read all instructions carefully before using the Midea MJ-60JM01B juicer. Keep this manual for future reference.
- Koyaushe a tabbatar an haɗa na'urar yadda ya kamata kafin a fara aiki.
- Kada a nutsar da gindin motar cikin ruwa ko wasu ruwaye.
- Unplug the juicer from the power outlet when not in use, before assembling or disassembling parts, and before cleaning.
- Avoid contact with moving parts. Ensure the lid is securely locked in place before operating.
- Kada a yi aiki da na'urar tare da lalace ko filogi, ko bayan na'urar ta yi rauni ko ta lalace ta kowace hanya.
- This appliance is not suitable for dishwashers. Refer to the cleaning section for proper care.
- Keep hands and utensils out of the feed chute during operation to prevent injury.
- Tabbatar an sanya na'urar a kan wuri mai santsi, mai faɗi, kuma busasshe.
2. Samfurin Ya Ƙareview
The Midea MJ-60JM01B is a 600W stainless steel juicer designed for efficient juice extraction from various fruits.
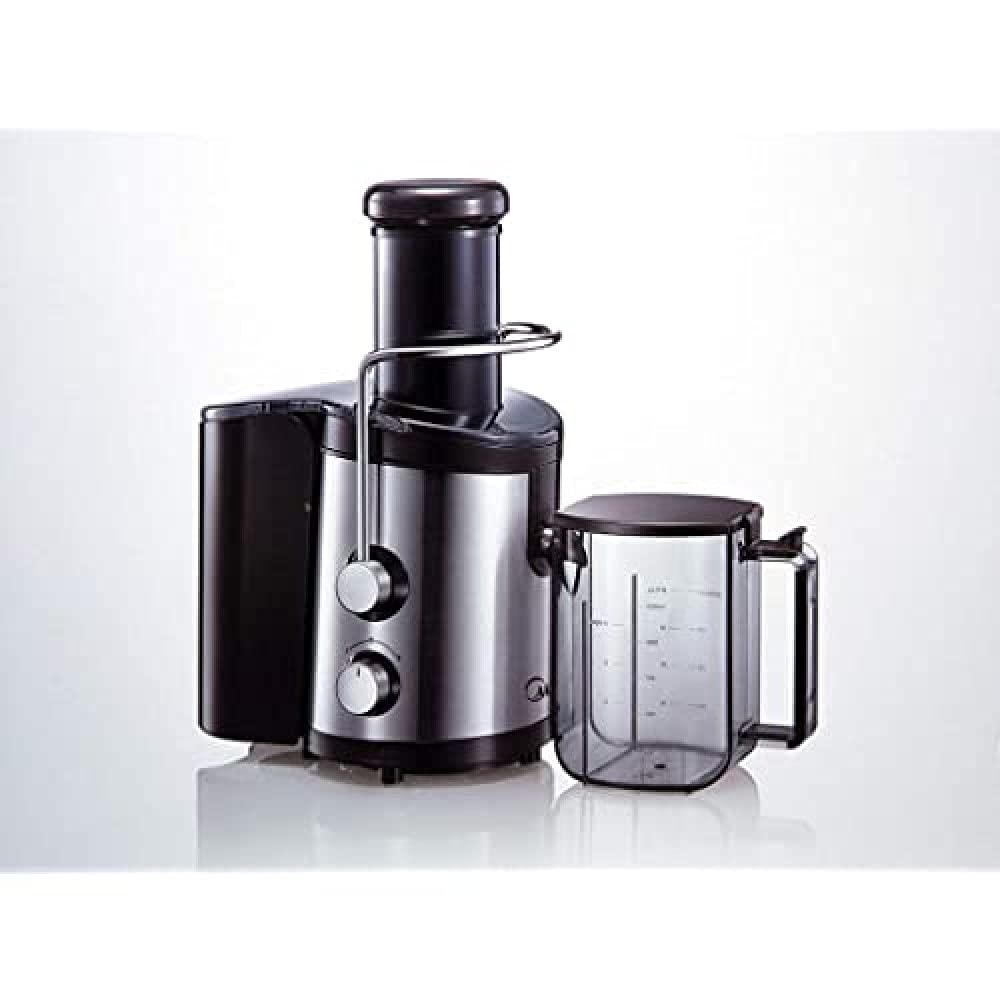
Image: The Midea MJ-60JM01B Juicer, showcasing its stainless steel body, pulp container, juice jug, and feed chute.
Abubuwan:
- Tushen Motoci: Contains the 600W motor and control panel.
- Kwantenan almara: Collects fruit pulp.
- Ruwan 'ya'yan itace: 1.25-liter capacity for collecting extracted juice.
- Kwandon Tace: Stainless steel filter for separating pulp from juice.
- Lid with Feed Chute: Secures the juicer and allows fruit insertion.
- Mai tura Abinci: Used to guide fruits down the feed chute.
3. Saita da Majalisa
Bi waɗannan matakan don haɗa na'urar juicer ɗinka daidai kafin amfani da farko.
- Sanya gindin motar a kan tsaftataccen wuri, bushe, kuma barga.
- Insert the pulp container onto the motor base, ensuring it clicks into place.
- Place the stainless steel filter basket securely onto the motor base, aligning it with the drive shaft.
- Position the lid with the feed chute over the filter basket and pulp container, ensuring it locks into place with the safety clips.
- Place the juice jug under the juice spout.
- Saka mai turawa abinci a cikin bututun ciyarwa.
4. Umarnin Aiki
Operating your Midea juicer is straightforward. Prepare your fruits and follow these steps.
Shiri:
- A wanke duk 'ya'yan itatuwa da kayan marmari sosai.
- For larger fruits, cut them into pieces that fit comfortably into the feed chute. The juicer is designed to handle whole fruits, but smaller pieces can optimize juice extraction.
- Remove hard pits from fruits like peaches, plums, or cherries.
Tsarin Ruwan 'Ya'yan Itace:
- Ensure the juicer is correctly assembled and the juice jug is in place.
- Plug the appliance into a 220V power outlet.
- Zaɓi saitunan saurin da ake so:
Gudu 1: For softer fruits and vegetables (e.g., berries, tomatoes).
Gudu 2: For harder fruits and vegetables (e.g., apples, carrots). - Turn on the juicer.
- Gradually feed the prepared fruits or vegetables into the feed chute using the food pusher. Apply gentle, even pressure. Do not force the food.
- Once juicing is complete, turn off the appliance and unplug it from the power outlet.
5. Tsaftacewa da Kulawa
Regular cleaning ensures optimal performance and extends the life of your juicer. Always unplug the appliance before cleaning.
- Cire juicer daga wutar lantarki.
- Disassemble the juicer by removing the food pusher, lid, filter basket, pulp container, and juice jug.
- Rinse all removable parts (except the motor base) under running water immediately after use to prevent pulp from drying.
- Use a cleaning brush (if provided, or a soft brush) to thoroughly clean the stainless steel filter basket. This is crucial for maintaining juicing efficiency.
- Wash the lid, pulp container, and juice jug with warm, soapy water. Rinse thoroughly and dry.
- Goge tushen motar tare da tallaamp zane. Kar a taɓa nutsar da gindin motar cikin ruwa ko wani ruwa.
- Ensure all parts are completely dry before reassembling or storing the juicer.
- Lura: The juicer parts are not dishwasher safe. Hand washing is required.
6. Shirya matsala
If you encounter issues with your Midea MJ-60JM01B juicer, refer to the following common problems and solutions.
| Matsala | Dalili mai yiwuwa | Magani |
|---|---|---|
| Juicer baya kunna. | Ba a toshe ba; kulle aminci ba a tsunduma; iko kutage. | Check power connection; ensure lid is securely locked; check household power. |
| Low ruwan 'ya'yan itace amfanin gona ko wuce kima ɓangaren litattafan almara. | Filter basket clogged; incorrect speed setting; feeding too quickly. | Clean filter thoroughly; use higher speed for harder produce; feed slowly and steadily. |
| Kayan aiki yana tsayawa yayin aiki. | An kunna kariyar lodi fiye da kima; yawan zafi a cikin mota. | Turn off and unplug; allow to cool for 15-30 minutes; reduce load size. |
| Ƙarar ƙara ko girgiza. | Improper assembly; damaged filter basket. | Disassemble and reassemble correctly; inspect filter for damage and replace if necessary. |
7. Ƙayyadaddun bayanai
Technical details for the Midea MJ-60JM01B Juicer.
- Samfura: MJ-60JM01B
- Ƙarfi: 600 W
- Voltage: 220 V
- Gudu: 2 (Ƙasa/Babba)
- Abu: Stainless Steel body and blade
- Juice Jug Capacity: 1.25 lita
- Nauyin samfur: 4.9 kg
- Sassan Safe na Wanki: A'a
8. Garanti da Tallafawa
Midea products are manufactured to high-quality standards. For specific warranty information, please refer to the warranty card included with your purchase or visit the official Midea website.
For technical support, spare parts, or service inquiries, please contact Midea customer service through their official channels. Keep your purchase receipt and model number (MJ-60JM01B) handy when contacting support.
Kuna iya samun ƙarin bayani da bayanan tuntuɓar a kan Midea Brand Store.