
Gabatarwa
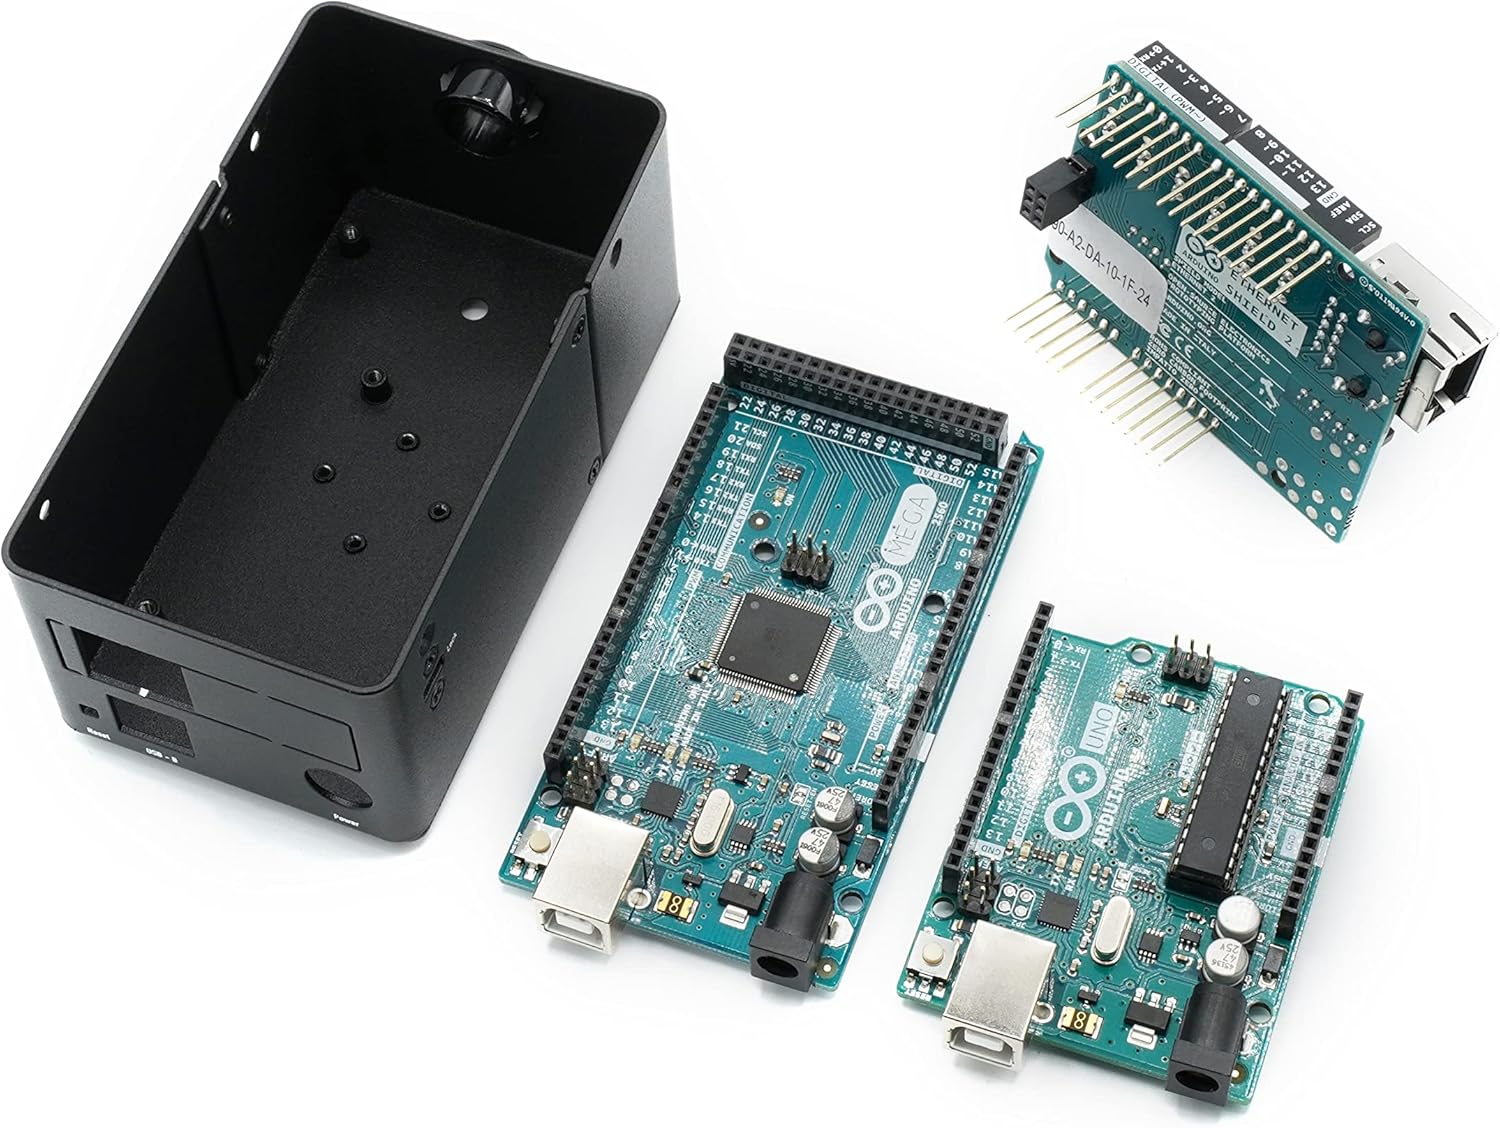
This manual provides detailed instructions for the assembly, installation, and proper use of the KKSB Case, designed for Arduino UNO Rev3 and Arduino Mega Rev3 boards. This robust steel enclosure offers protection and versatile mounting options for your Arduino projects, including space for an Arduino Shield.
Abubuwan Kunshin
Please verify that all components are present before proceeding with assembly.
- KKSB Case (Steel, black powder-coated)
- Mounting screws for Arduino board
- Rubber feet (adhesive)
- Cable gromet

Saita da Shigarwa
Follow these steps to install your Arduino UNO Rev3 or Arduino Mega Rev3 board into the KKSB Case.
1. Prepare the Case
- Carefully remove the lid of the KKSB case by unscrewing the four corner screws. Note that some cases may have additional screws that do not need to be removed for lid access.
- If using, attach the adhesive rubber feet to the bottom of the case for stability.

2. Install the Arduino Board
- Align your Arduino UNO Rev3 or Arduino Mega Rev3 board with the mounting holes inside the case. Ensure that the USB and power ports align with the corresponding cutouts on the case.
- Secure the Arduino board to the case using the provided mounting screws. Do not overtighten.
- If you are using an Arduino Shield, install it onto your Arduino board before closing the case. The case provides sufficient vertical space for most standard shields.


3. Rufe Harka
- Replace the lid and secure it with the four corner screws.
- If routing cables, use the provided cable grommet in the designated opening to protect wires from sharp edges.
La'akarin Aiki
The KKSB Case is designed to protect your Arduino board while providing access to essential ports and features.
- Shiga Port: All standard Arduino UNO/Mega ports, including USB-B, power jack, and reset button, are accessible through labeled cutouts.
- Shield Compatibility: The case accommodates an Arduino Shield, allowing for expanded functionality without requiring external modifications.
- Na'urar USB: Openings are provided for routing cables, and a grommet is included for protection.
- Samun iska: The case features ventilation slots to aid in passive cooling of the internal components.

Zaɓuɓɓukan hawa
The KKSB Case offers several mounting solutions for integration into various environments.
- DIN Rail Dutsen: The case supports DIN rail mounting for industrial or organized setups.
- Pre-cut Mounting Holes: Additional pre-cut mounting holes are available for custom installations.
- Kensington Lock Compatibility: A slot is included for a standard Kensington lock, providing a theft deterrent for public or shared environments.


Kulawa
The KKSB Case requires minimal maintenance.
- Tsaftacewa: Wipe the exterior with a soft, dry cloth. Avoid abrasive cleaners or solvents.
- Dubawa: Periodically check screws for tightness, especially if the case is subjected to vibrations or frequent movement.
- Muhalli: Ensure the case is used in a dry environment, away from excessive dust or moisture, to protect the internal electronics.
Shirya matsala
If you encounter issues during installation or use, consider the following:
- Board Not Fitting: Ensure you are using a compatible Arduino UNO Rev3 or Arduino Mega Rev3 board. Verify that no components on the board are obstructing the mounting posts or case edges.
- Port Misalignment: Double-check the orientation of the Arduino board before securing it. The ports should align perfectly with the case cutouts.
- Rufe Ba Rufewa: Ensure all internal components, especially shields, are seated correctly and not exceeding the case's internal height. Verify that no wires are pinched.
Ƙayyadaddun bayanai
| Alamar | Farashin KKSB |
| Lambar Samfura | 7350001161273 |
| Daidaituwa | Arduino UNO Rev3, Arduino Mega Rev3 (and compatible clones) |
| Kayan abu | Steel, black powder-coated |
| Girma (LxWxH) | 2.99 x 4 x 4.5 inci (7.59 x 10.16 x 11.43 cm) |
| Nauyin Abu | 9.1 oz (0.26 kg) |
| Siffofin | Space for Arduino Shield, labeled cutouts, cable routing openings, Kensington lock slot, DIN Rail mounting support, pre-cut mounting holes. |
Garanti da Taimako
For warranty information or technical support, please refer to the official KKSB Cases website ko tuntuɓi dillalin ku. Ajiye shaidar siyan ku don kowane da'awar garanti.
Official KKSB Cases Website: kksb-cases.com