
Gabatarwa
Thank you for choosing the NEMO Atom OSMO 1P Mesh Tent. This manual provides essential information for the safe and effective use of your tent. The Atom OSMO 1P is a lightweight, single-person tent designed for backpacking and camping, featuring durable OSMO fabric, a spacious interior, and a functional vestibule. Please read these instructions thoroughly before your first use and retain them for future reference.
Bayanin Tsaro
- Tsaron Wuta: Keep all flame and heat sources away from tent fabric. The tent is not fireproof.
- Samun iska: Ensure adequate ventilation to prevent condensation and carbon monoxide buildup if using heating or cooking devices (not recommended inside the tent).
- Yanayi: While designed for durability, extreme weather conditions (high winds, heavy snow, severe thunderstorms) can damage the tent and pose risks. Seek appropriate shelter if conditions worsen.
- Zaɓin Yanar Gizo: Choose a level, clear site away from potential hazards like falling rocks, dead trees, or flood-prone areas.
Abubuwan Kunshin
Verify that all components are present before your trip:
- Tent Body (Inner Tent)
- Ruwan sama
- Tent Poles (Main pole assembly)
- Tent Stakes/Pegs (Typically 8-10)
- Guy-out Cords (Pre-attached or separate)
- Repair Kit (Fabric patches, pole sleeve)
- Stuff Sack for Tent
- Stuff Sack for Poles and Stakes

Image: The NEMO Atom OSMO 1P tent packed in its stuff sack alongside the separate pole and stake bag.
Saita Umarnin
- Shirya Shafin: Clear the chosen area of sharp objects, rocks, and debris. Lay out the tent footprint (if using) or the tent body directly.
- Haɗa Sanduna: Connect the tent pole sections. The Atom OSMO 1P typically uses a single hubbed pole system for quick setup.
- Attach Tent Body: Lay the tent body flat. Insert the pole ends into the grommets or sleeves at the corners of the tent. Clip the tent body to the pole structure.
- Stake Out Tent Body: Secure the four main corners of the tent body with stakes. Pull the corners taut for a firm base.
- Drape Rainfly: Place the rainfly over the tent body, aligning the vestibule door with the inner tent door. Ensure the NEMO logo on the fly is facing the correct direction.
- Haɗa Rainfly: Secure the rainfly to the tent poles or tent body corners using the buckles or clips provided.
- Stake Out Vestibule and Guy-lines: Stake out the vestibule door(s) to create usable space. Extend and stake out all guy-lines for maximum stability and wind resistance. Adjust tension as needed.
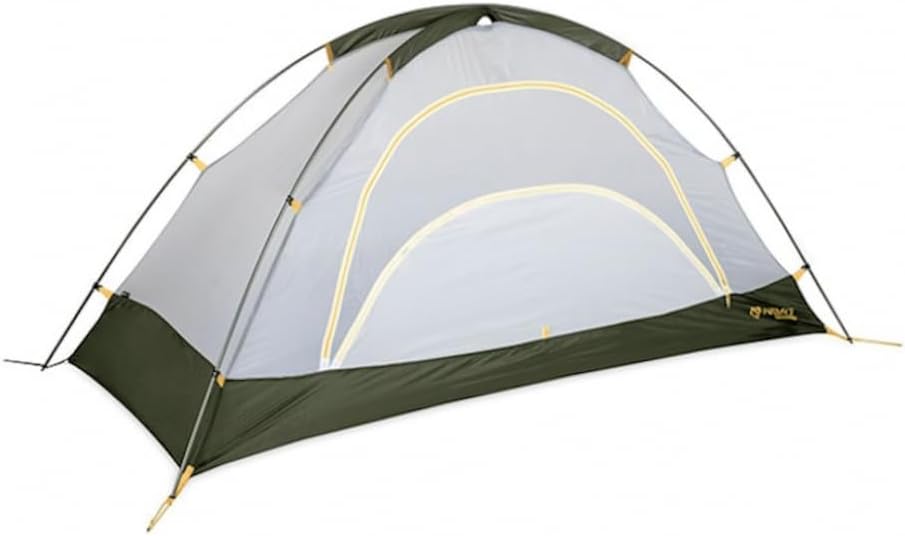
Image: The NEMO Atom OSMO 1P tent fully pitched, showing its structure and rainfly.

Image: A close-up of the tent's vestibule area, demonstrating space for gear like shoes.
Umarnin Aiki
Entry and Exit
The tent features a single side entry. Unzip the vestibule door, then unzip the inner tent door to enter or exit. Always close zippers completely to prevent insects and moisture from entering.
Samun iska
Proper ventilation is crucial to minimize condensation. The Atom OSMO 1P includes mesh panels and adjustable vents.
- Inner Tent Mesh: The inner tent is largely mesh, providing excellent airflow.
- Rainfly Vents: The rainfly features vents that can be propped open to allow air circulation while keeping rain out. Adjust these based on weather conditions.

Hoto: Wani ciki view showing the upper mesh and zipper of the tent, indicating ventilation points.
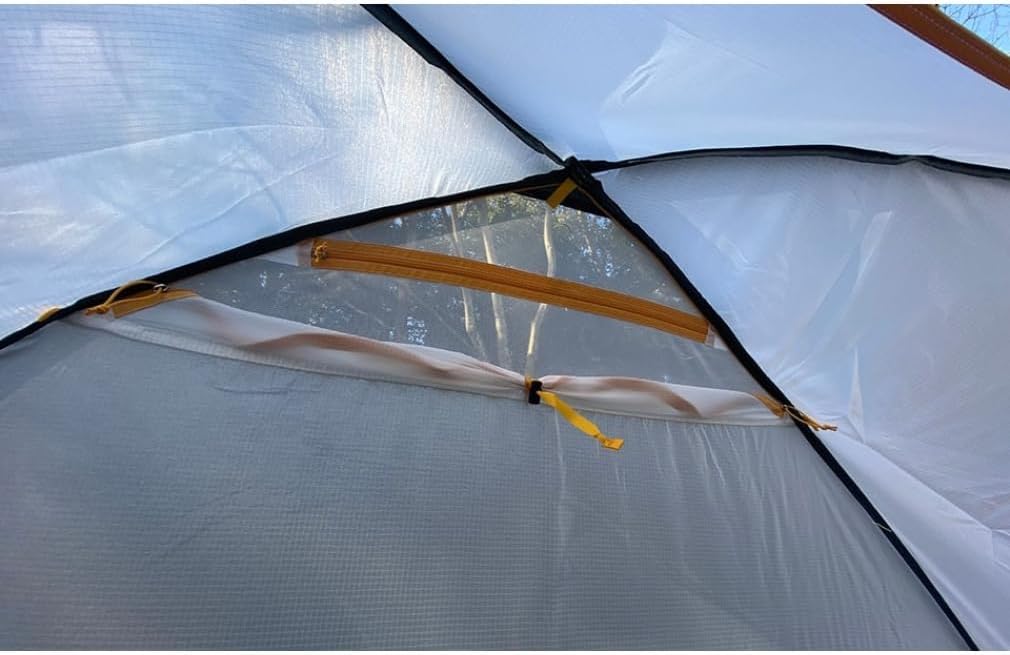
Image: A detailed interior shot highlighting the upper mesh and ventilation design of the tent.

Hoto: Wani waje view of the tent's rainfly vent, designed to allow airflow.
Sararin ciki
The tent offers ample space for a single occupant and a sleeping pad. Internal pockets are provided for small item storage.

Image: The interior of the tent showing a sleeping pad, illustrating the available space for a single person.
Disassembly and Packing
- Remove Stakes and Guy-lines: Unstake all guy-lines and tent corners.
- Remove Rainfly: Detach the rainfly from the tent body and poles. Fold or roll it neatly.
- Disassemble Poles: Carefully remove the tent poles from the grommets/sleeves and collapse them. Store them in their dedicated stuff sack.
- Collapse Tent Body: Unclip the tent body from the poles. Lay the tent body flat and fold or roll it to fit into its stuff sack.
- Pack All Components: Ensure all components are dry and clean before packing. Place the tent body, rainfly, poles, and stakes into their respective stuff sacks.

Image: The NEMO Atom OSMO 1P tent neatly packed into its stuff sack, ready for transport.
Kulawa da Kulawa
- Tsaftacewa: Clean the tent with a sponge and mild, non-detergent soap. Do not machine wash or dry clean. Rinse thoroughly.
- bushewa: Always ensure the tent is completely dry before packing and storing to prevent mildew and fabric degradation. Hang it in a shaded, well-ventilated area.
- Ajiya: Store the tent loosely in a cool, dry place, away from direct sunlight and extreme temperatures. Avoid compressing it tightly for long periods.
- Gyara: Use the included repair kit for minor tears. For significant damage, contact NEMO customer service or a professional repair service.
Shirya matsala
| Batu | Dalili mai yiwuwa | Magani |
|---|---|---|
| Danshi a cikin tanti | Lack of ventilation, high humidity, temperature difference. | Increase ventilation by opening vents and doors (if weather permits). Choose a well-drained campsite. |
| Tent not stable in wind | Improper staking, loose guy-lines, insufficient tension. | Ensure all stakes are firmly in the ground. Tighten all guy-lines. Orient the tent with the narrowest end facing the wind. |
| Zubar ruwa | Damaged fabric, seam sealant failure, improper rainfly setup. | Check for tears and repair with the patch kit. Reapply seam sealant if necessary. Ensure rainfly is taut and properly positioned. |
| Zipper sticking | Dirt, debris, or fabric caught in zipper. | Clean zipper teeth. Gently pull fabric away from the zipper path. Apply a zipper lubricant if needed. |
Ƙayyadaddun bayanai
- Samfura: NM-ATMOS-1P-MB
- Iyawa: 1 Mutum
- Mafi qarancin Nauyi: 1.35 kg (2 lbs 15 oz)
- Cikakken nauyi: (Not explicitly stated, but usually slightly higher than minimum)
- Floor Dimensions: 210 cm (tsawo) x 90 cm (Nisa)
- Interior Peak Height: 105 cm
- Girman Ciki: Approximately 43 cm length (based on review hoto)
- Fabric: OSMO (Nylon, Polyester blend)
- An Shawarar Amfani: Camping, Hiking, Trekking, Backpacking, Travel, Mountain Climbing
Garanti da Taimako
NEMO products are designed for durability and performance. For specific warranty details, product support, or to inquire about repairs, please visit the official NEMO website ko tuntuɓi sabis na abokin ciniki kai tsaye. Ajiye shaidar siyan ku don da'awar garanti.


