1. Gabatarwa
This manual provides detailed instructions for the installation, operation, and maintenance of your Generic 106A W1106A toner cartridge. Please read these instructions carefully before use to ensure optimal performance and longevity of your product.
The 106A W1106A toner cartridge is designed to deliver high-quality prints for various applications, including office, school, and home use.

Figure 1: The toner cartridge is suitable for various printing environments such as home, school, and office.
2. Daidaituwa
The Generic 106A W1106A toner cartridge is compatible with the following HP printer models:
- HP 107A
- HP 107W
- HP MFP 135A
- HP MFP 135W
- HP 137FNW
Important: Please confirm your printer model before purchasing don tabbatar da dacewa.

Figure 2: Compatible printer models for the 106A W1106A toner cartridge.
3. Ƙayyadaddun bayanai
- Samfura: 106A W1106A
- Launi: Baki
- Samuwar Shafi: Approximately 1000 pages (at 5% A4 paper coverage)
- Girman samfur: 0.39 x 0.39 x 0.39 inci
- Nauyin Abu: 2.2 fam (Kilogram 1)
- Takaddun shaida: ISO9001, ISO14001

Figure 3: Expected page yield for the 106A W1106A black toner cartridge.
4. Saita (Shigarwa)
Follow these steps to properly install your new toner cartridge:
- Shiri: Before installation, it is recommended to use a vacuum cleaner or a soft, dry cloth to clean any remaining toner or paper scraps inside the printer. Avoid blowing air into the printer, as this can spread toner dust.
- Girgiza Kasuwar: Take the new toner cartridge out of its packaging. Gently shake it horizontally 4-8 times to ensure the toner powder is evenly distributed within the cartridge.
- Remove Protection Buckles: Locate and remove the orange protection buckles on both sides of the toner cartridge. If there is any isolation paper, slowly pull out the black isolation paper in the direction indicated.
- Pull the Seal: Carefully pull the sealing strip evenly and straight until it is completely removed. Avoid tearing or breaking the seal. The length of the seal is approximately twice the length of the toner cartridge.
- Install into Printer: Open the printer's toner compartment. Align the toner cartridge with the guide rails inside the printer and push it smoothly until it clicks securely into place. Ensure it is fully seated.
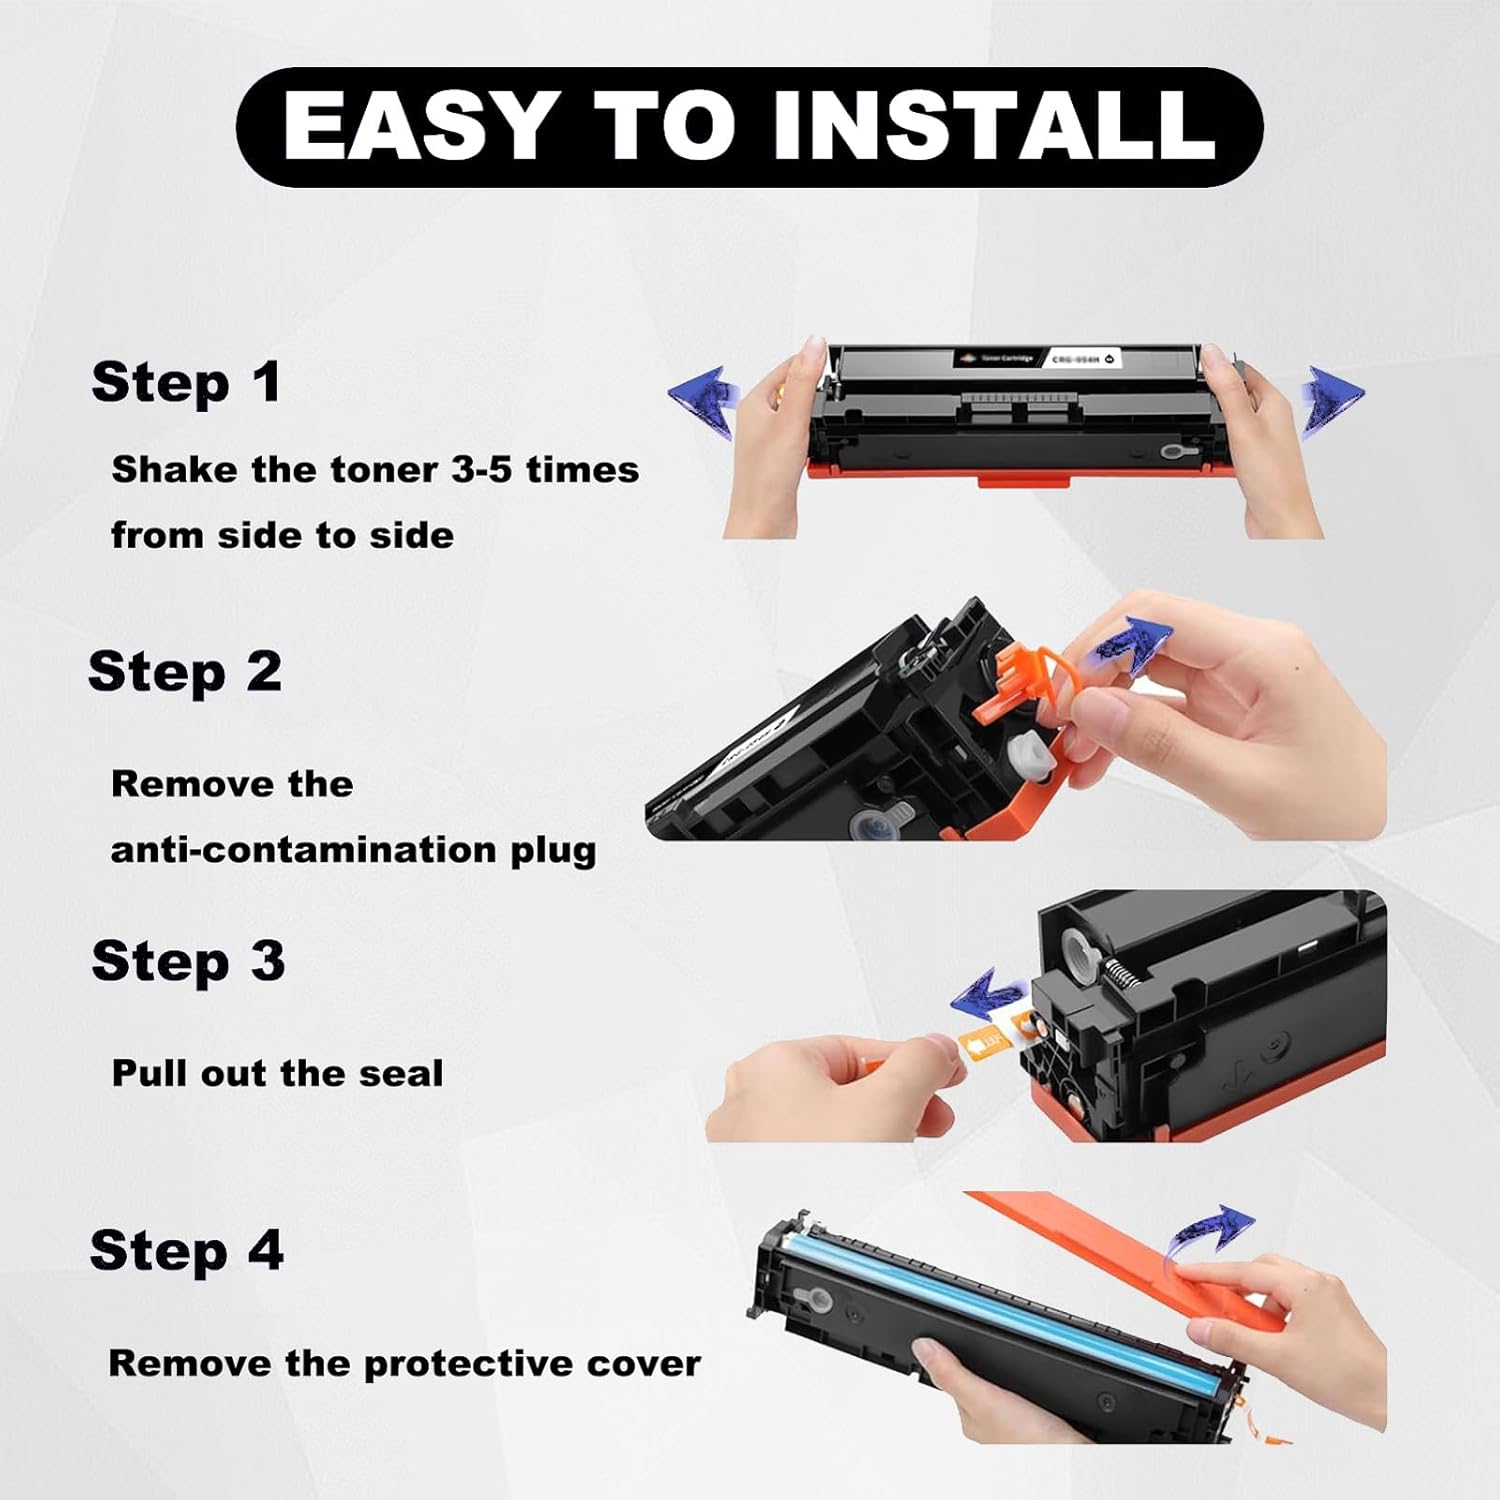
Figure 4: Step-by-step installation process for the toner cartridge.
5. Aiki (Amfani)
Once installed, the toner cartridge is ready for use. The cartridge is designed to provide clear text and bright colors, meeting high printing standards for various documents and images.

Hoto na 5: Examples of print quality, showcasing clear black and vibrant color output.
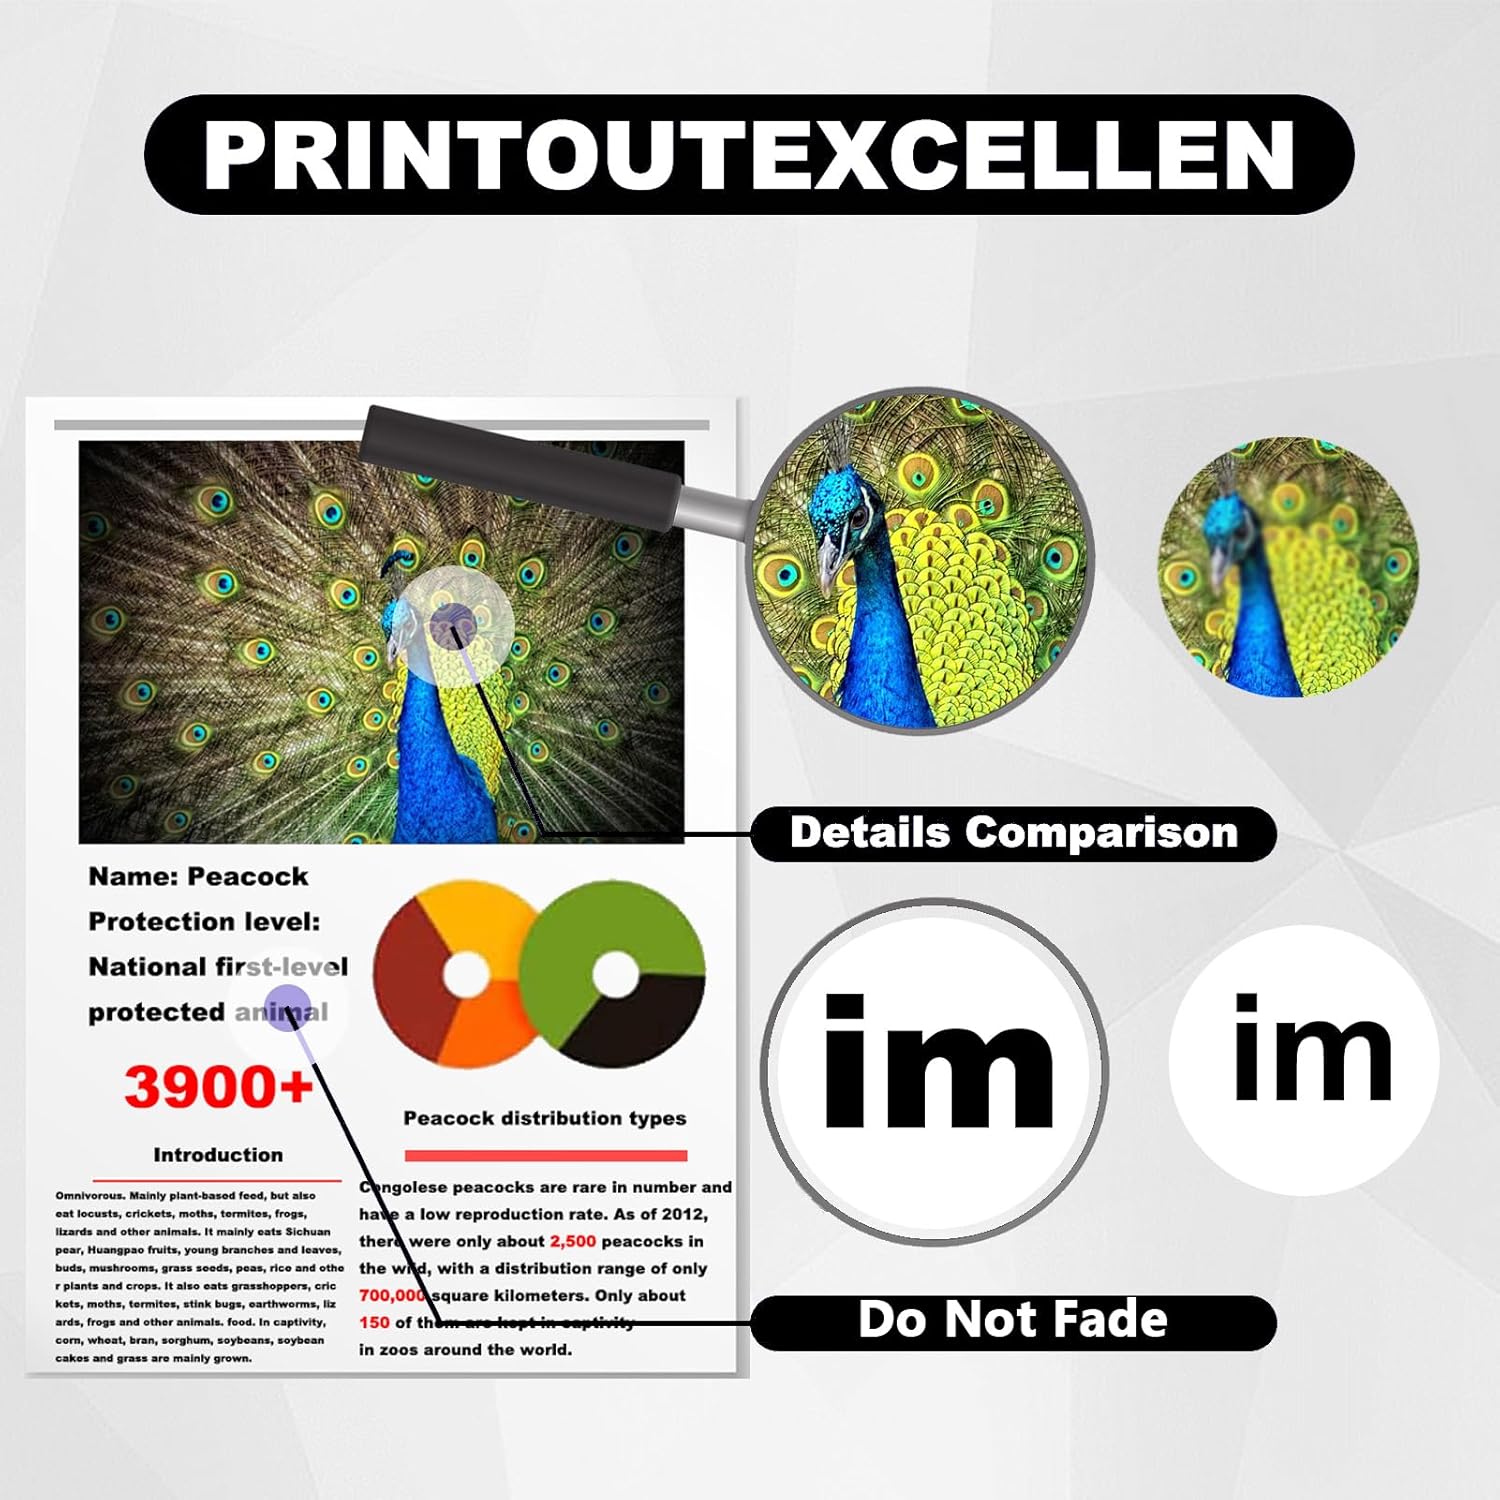
Figure 6: The toner cartridge ensures excellent print detail and resistance to fading.
6. Kulawa
Proper handling and maintenance can extend the life and performance of your toner cartridge:
- Drum Core Protection: During installation or removal, avoid touching the drum core. Scratches on the drum core can significantly affect print quality.
- Chip Handling: Do not touch the chip on the toner cartridge. The chip is crucial for communication with the printer and ensures optimal performance.
- Ajiya: Ajiye harsashin toner da ba a yi amfani da shi ba a cikin marufin da aka rufe na asali a wuri mai sanyi da bushewa, nesa da hasken rana kai tsaye da kuma yanayin zafi mai tsanani.
7. Shirya matsala
If you encounter issues with your toner cartridge, consider the following:
- Print Quality Issues (Streaks, Fading): Ensure the toner cartridge was shaken properly before installation to distribute toner evenly. Check if the sealing strip was fully removed.
- Printer Not Recognizing Cartridge: Verify that the cartridge is fully seated in the printer. Gently remove and reinsert it. Ensure the chip on the cartridge is clean and undamaged.
- Duban dacewa: Due to regional variations in printer models, some models may require you to transfer the original chip from your old cartridge to the new one. Please confirm your specific printer model's requirements if issues persist.
- Saƙonnin Kuskure: Refer to your printer's user manual for specific error codes and troubleshooting steps.
8. Garanti da Tallafawa
This product is manufactured under strict quality control processes, including ISO9001 and ISO14001 certifications, to ensure high standards.
If you have any questions or require assistance, please contact our customer support directly. We are committed to responding to your inquiries within 24 hours and providing effective solutions to resolve any issues you may encounter.


