1. Gabatarwa
This manual provides essential information for the safe and effective operation, maintenance, and troubleshooting of your HYCO PH65 Corded Electric Demolition Hammer. Please read this manual thoroughly before using the tool to ensure proper handling and to prevent injury or damage.
The HYCO PH65 is a heavy-duty demolition hammer designed for breaking concrete, masonry, and rubble. It features a powerful 2000W motor, a 25.07 mm chuck for quick bit changes, and a shock absorber for enhanced user comfort.
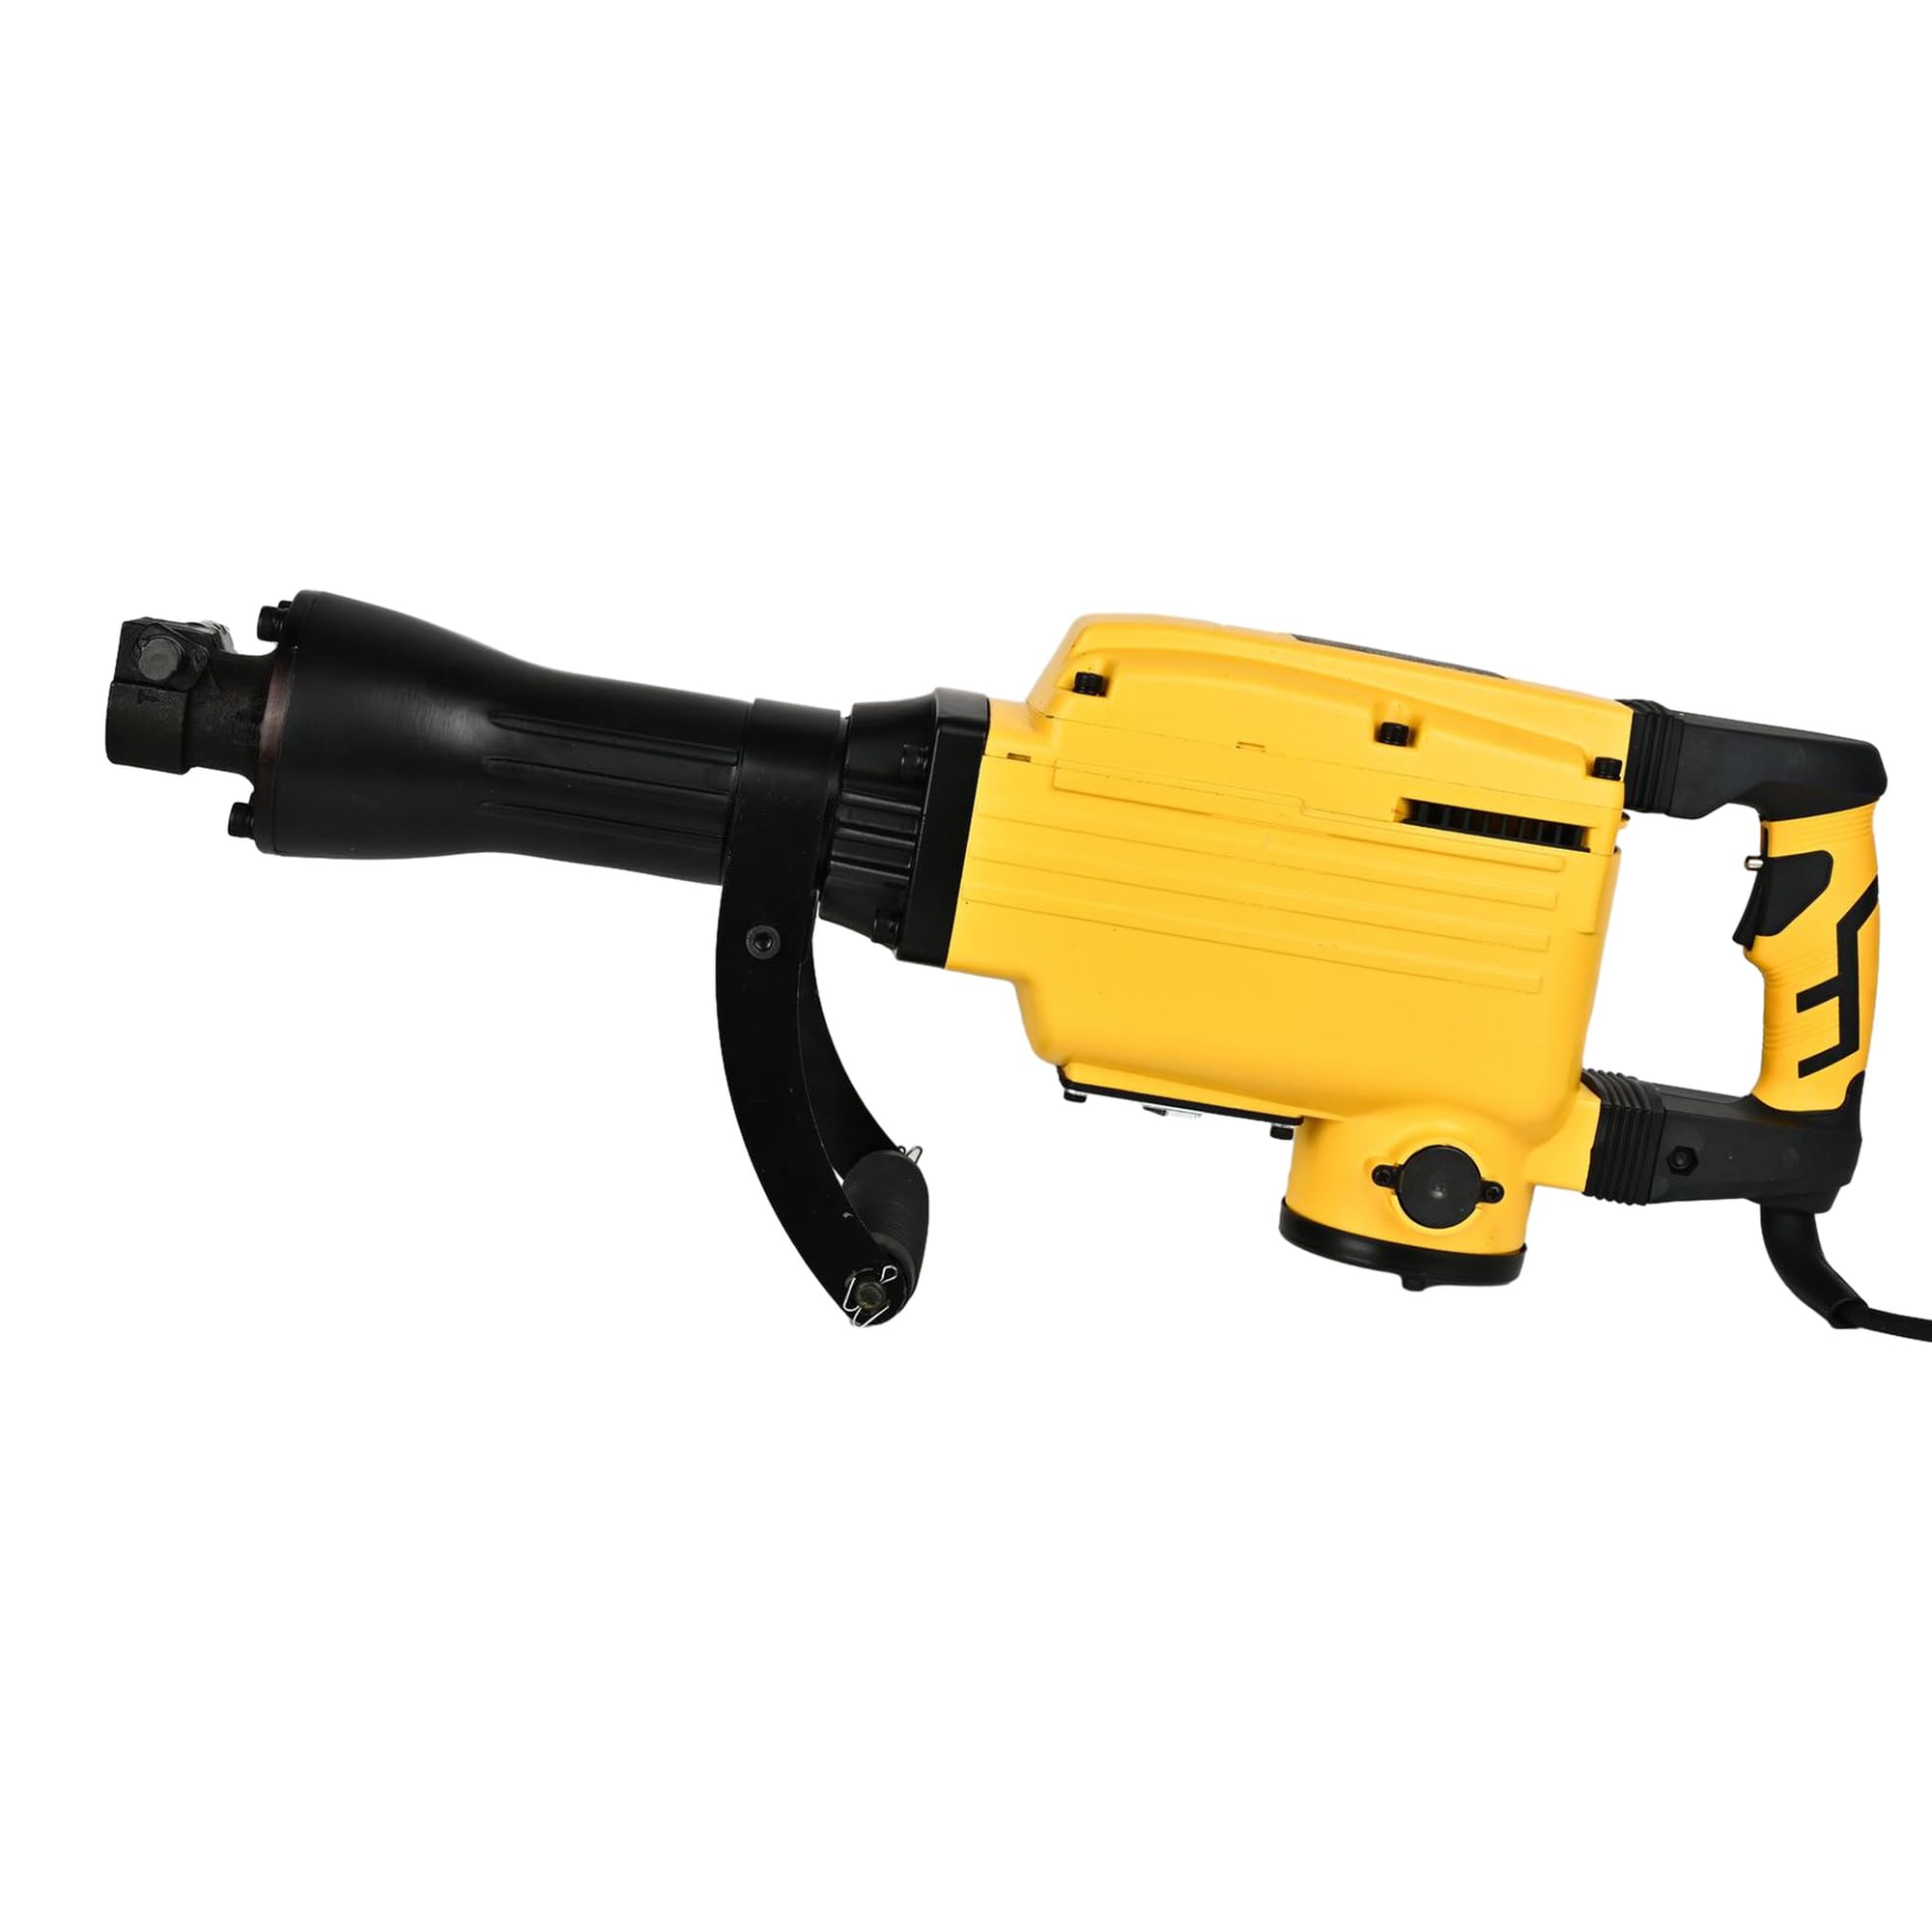
Hoto 1: Gabaɗaya view of the HYCO PH65 Demolition Hammer.
2. Umarnin Tsaro
Koyaushe bi matakan tsaro na asali don rage haɗarin gobara, girgiza wutar lantarki, da rauni na sirri lokacin aiki da kayan aikin wuta.
- Tsaron Yankin Aiki: Tsaftace wurin aiki da tsabta da haske. Wurare masu duhu ko duhu suna kiran haɗari. Kada a yi amfani da kayan aikin wuta a cikin abubuwan fashewa, kamar a gaban ruwa mai ƙonewa, gas, ko ƙura.
- Tsaron Wutar Lantarki: Dole ne toshewar kayan aikin wutar lantarki ta dace da wurin fitar da wutar lantarki. Kada a taɓa gyara toshewar ta kowace hanya. A guji taɓa jiki da saman ƙasa ko na ƙasa kamar bututu, radiators, range, da firiji.
- Tsaro na Keɓaɓɓen: Always wear eye protection. Use hearing protection when operating the tool. Wear a dust mask if working in dusty conditions. Dress properly; avoid loose clothing or jewelry.
- Amfani da Kulawa: Kar a tilasta kayan aikin wutar lantarki. Yi amfani da madaidaicin kayan aikin wuta don aikace-aikacenku. Cire haɗin filogi daga tushen wutar lantarki kafin yin kowane gyare-gyare, canza kayan haɗi, ko adana kayan aikin wuta.
- Safety Lock-on Button: The tool incorporates a safety lock-on button to prevent unintentional start-up. Ensure you understand its operation before use.
- Jijjiga Dampgamawa: The tool is designed with vibration dampening for operator comfort. However, prolonged use can still cause discomfort. Take regular breaks.
3. Samfurin Ya Ƙareview
Familiarize yourself with the components of your HYCO PH65 Demolition Hammer.

Figure 2: Main handle and trigger assembly.

Hoto 3: Gefe view showing the auxiliary handle for better control.

Figure 4: Product label with model and electrical specifications.
4. Ƙayyadaddun bayanai
| Ƙayyadaddun bayanai | Daraja |
|---|---|
| Alamar | Hyco |
| Samfura | Saukewa: PH65 |
| Tushen wutar lantarki | Corded Electric |
| Voltage | 220 Volts |
| Matsakaicin Ƙarfi | 2000 Watts |
| Matsakaicin Girman Chuck | 25.07 millimeters |
| Nauyin Abu | 16 kilogiram |
| Girman samfur | 78L x 42W x 22H Santimita |
| Nau'in Direba | Guduma Rawar soja |
| Abubuwan da aka haɗa | Comes as a Combo Set |
5. Saita
5.1 Haɗa Hannun Taimako
The auxiliary handle provides additional control and stability during operation. Securely attach it to the tool body in a comfortable position for your working posture.
5.2 Installing/Changing Chisels or Bits
- Tabbatar an cire kayan aikin daga tushen wutar lantarki.
- Locate the chuck mechanism. The 25.07 mm chuck is designed for quick bit changes.
- Insert the chisel or bit firmly into the chuck until it locks into place. Pull on the bit to ensure it is securely seated.
- To remove, follow the chuck's release mechanism (refer to specific chuck design if different from standard push-and-twist).
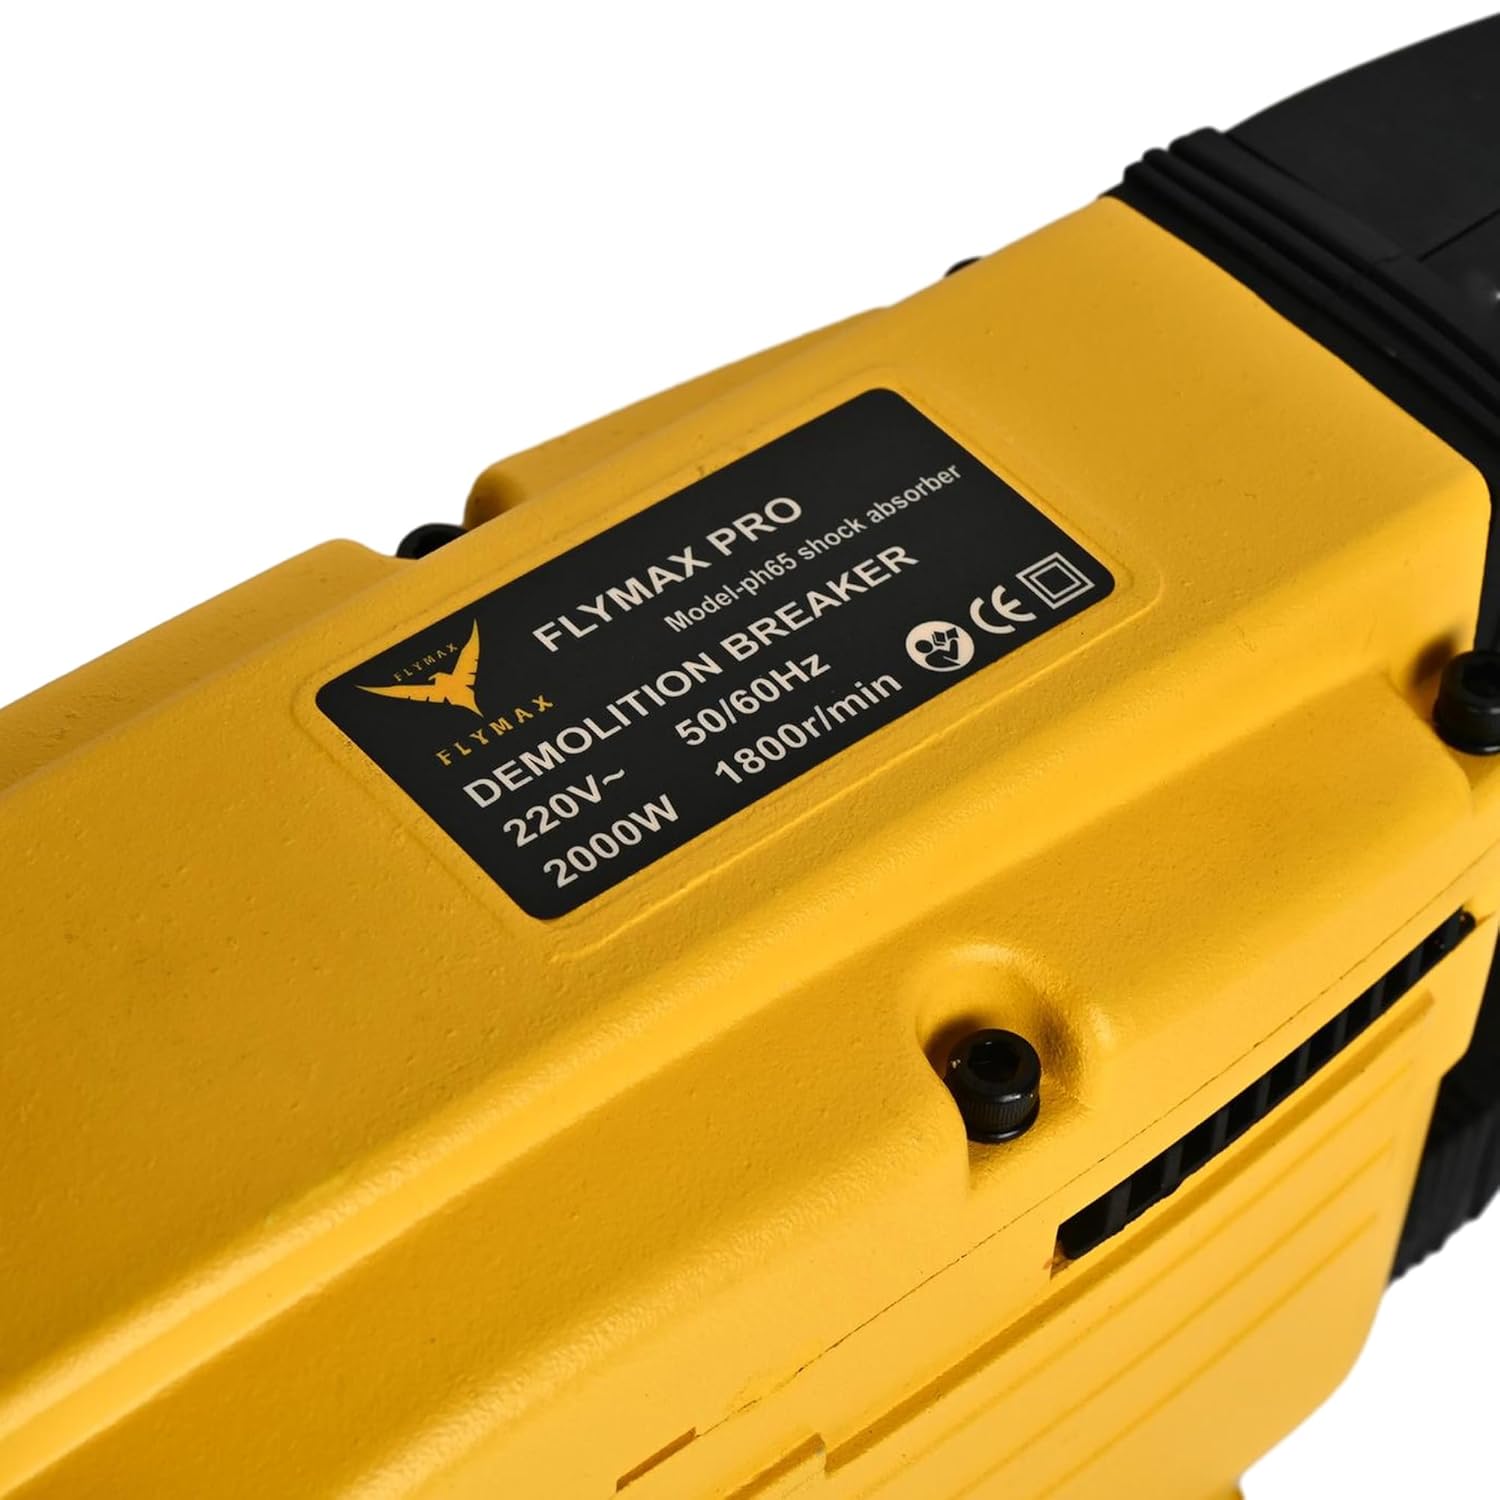
Figure 5: Chuck mechanism for bit insertion.
6. Umarnin Aiki
6.1 Haɗin Wuta
Connect the power cord to a suitable 220V electrical outlet. Ensure the power source is stable and capable of handling the tool's 2000W power consumption.
6.2 Starting the Tool
Press the trigger to start the demolition hammer. If equipped, release the safety lock-on button before pressing the trigger. The tool is designed for heavy-duty demolition, chiseling, and concrete breaking jobs.
6.3 Demolition Technique
- Hold the tool firmly with both hands, utilizing the main and auxiliary handles.
- Position the chisel or bit against the material to be broken.
- Apply steady, firm pressure. Allow the tool's impact energy to do the work. Do not apply excessive force, as this can reduce efficiency and increase wear.
- Work systematically, breaking material into manageable pieces.
6.4 Ci gaba da Aiki
For extended use, the tool's corded electric power ensures continuous operation without battery recharging. However, take regular breaks to prevent fatigue and ensure safe handling.
7. Kulawa
Kulawa akai-akai yana tabbatar da tsawon rai da kuma ingantaccen aikin hammatar rushewar ku.
7.1 Tsaftacewa
- After each use, clean the tool to remove dust, debris, and concrete residue.
- Use a dry cloth or soft brush. Do not use solvents or abrasive cleaners.
- Tabbatar da buɗaɗɗen samun iska a sarari don hana zafi.
7.2 Lubrication
Periodically lubricate the internal mechanisms as indicated by the lubrication port. Refer to the tool's specific lubrication requirements and recommended lubricants.

Figure 6: Lubrication port.
7.3 Dubawa
- Regularly inspect the power cord for damage. Replace immediately if frayed or cut.
- Check the chuck for wear and ensure bits are held securely.
- Inspect the housing for cracks or damage. The robust all-steel housing is designed for durability, but severe impacts can cause damage.
8. Shirya matsala
If you encounter issues with your HYCO PH65 Demolition Hammer, refer to the following common problems and solutions.
| Matsala | Dalili mai yiwuwa | Magani |
|---|---|---|
| Kayan aiki baya farawa | No power supply; Damaged cord; Faulty switch | Check power outlet and circuit breaker; Inspect power cord for damage; Contact service center if switch is faulty. |
| Rage ƙarfin tasiri | Worn chisel/bit; Insufficient lubrication; Internal wear | Replace worn chisel/bit; Check and replenish lubrication; Contact service center for internal inspection. |
| Yawan girgiza ko hayaniya | Loose components; Internal damage; Worn parts | Tighten any loose screws; Discontinue use and contact service center for inspection. |
For problems not listed or if solutions do not resolve the issue, contact HYCO customer support.
9. Garanti da Tallafawa
For warranty information, service, or technical support, please refer to the warranty card included with your product or visit the official HYCO website. Ajiye rasidin siyan ku azaman shaidar siyan don da'awar garanti.


